
___________________________________________________________________________
Note: I would like to share with you through these few words, photographs and hyperlinked websites, a 3 Dimensional experience as though you were actually there with us. Click on any photograph and it should enlarge to different size ….. at least half screen or size full screen. It will be clearer in detail than the photo on the post. It will be as if you were really there looking at the actual scene. You are an arm chair traveller with us.
____________________________________________________________________________
This is a process description of the dipping pool as it is being constructed over several months. It isn’t a swimming pool as this would be very expensive to construct and would need a much bigger space. A pool would need to comply with many council regulations and special inspections. It would need a big fence around it to make it safe. We just wanted a pool that we could go to near our house, have a dip in water in the hot summer weather, get cool and come out again.
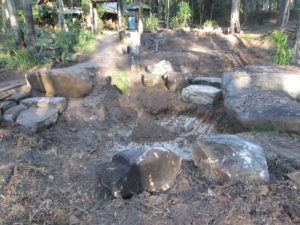

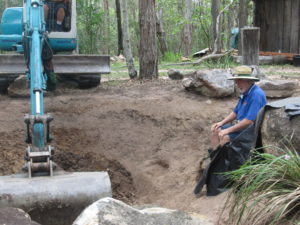
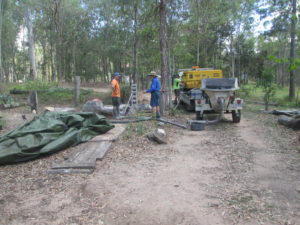
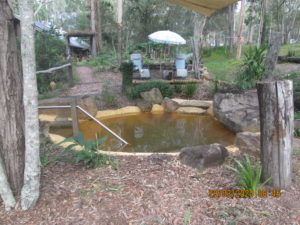
April 2016: We are really enjoying the cooler weather. In the last week, we had a small mini – excavator and Bobcat (which came together) out for the whole day … digging out a new dipping pool. It is neck deep with a rounded bottom. The mini – excavator had a rock attachment which picked up a heavy 1.00 metre granite rock and moved it to the other side of the pool. Three big granite rocks had been roughly placed as leftover boulders from a landscape job from twenty years ago. It was the rock on the far side which was moved. See the photos above.
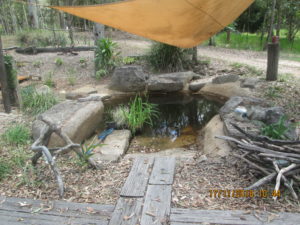
The excavated pool will be lined by spraying earth – coloured concrete so that the clay and rock base are not apparent. This will be reinforced with a Polypropylene fibre. We will then fill it with bore water over a night and day. It will be used as a natural dipping pool in the hot Queensland summer period. With frequent topping up with bore water, the water should be relatively clear. In the past I’ve seen it running 100 mm deep over this area with torrential rain. Any excess site runoff water will now flow around the pool and boulders to flow under a level driveway bridge and down into the paddock below.
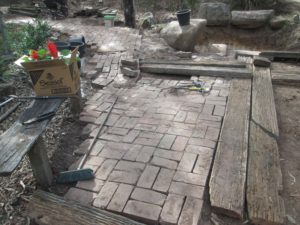
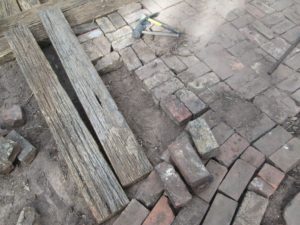
In May, I have been laying new brick paving in old onsite bricks pulled up from some paving I had done years ago in the main front garden. The paving had to sweep down the path in line with the path through the Permaculture Garden Room.
Then it changed to an area of basket weave paving at the pool level. This pattern has been around for centuries and can be seen decorating ancient European towns. The basket weave pattern can be thought of as a checkerboard-like pattern that is composed of pairs of bricks. The bricks are laid horizontally and vertically against each other to create the visual effect of them weaving in and out of each other. This is a very eye-catching pattern, and is appealing in patio or entertainment areas within your landscape. See the photos below.
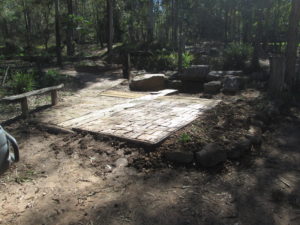
I am going to repeat the same pattern on the other side. My son Anthony is helping by working in with me by laying complementary hardwood demolition timber stored on our land from when I ran a twenty year business in landscape and construction. We are having a wonderful time interacting with each other. I haven’t done this sort of work for twenty years.
See these posts: MY PAST WORK
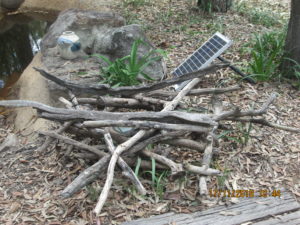
The other day Anthony bought a big drop saw that can easily cut through big 75 mm thick hardwood timbers. He is starting to cut and lay the heavy hardwood demolition timber as demolition timber paving that meshes in with the new brick paving. See these photos below.
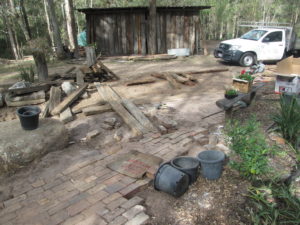
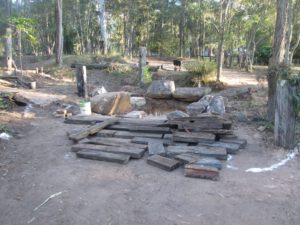
What Anthony started off with … a pile of demolition timber ….. which piece goes where? That is what he had to work out.
My brick paving had to sweep down the path in line with the path through the Permaculture Garden Room. Then it changed to area of basket weave paving.
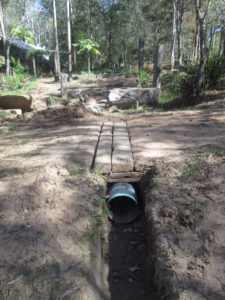

A deep gully or trench was dug to run site runoff water around the back of the boulders. Site runoff is then run into a big pipe which is already in place under the existing small timber bridge across the exit driveway. See the photos above. The basic work was finished in July 2016 …..
_____________________________________________________
Spraying the dipping pool with concrete in October 2016
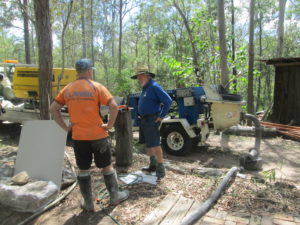
We had our friend John Tunstall come out to look at how to spray the dipping pool with concrete. John has had many years of difficult and very intricate landscape construction work since 1959 and is he now retired but he knows so much about construction. He built all the stone walls in our house 35 years ago. See this post on building our house in 1981
The excavated pool was lined by spraying earth-coloured concrete so that the clay and rock base were not apparent. This was reinforced with Polypropylene fibre rather than steel mesh. This enabled the finished product to have a very fluid and rounded finish instead of a more rigid vertical finish.
A shallow gully or trench was dug to run site runoff water around the back of the boulders and pool. Site runoff water would then to run into a big pipe which is already in place under the small timber bridge across the exit driveway. As of January 2017, the plan is to lay black plastic about 0.75 metres wide in the shallow gully. This would be topped with heavy river gravel (stones to 75 mm in diameter). This would make it look as if a dry creek goes around the back of the pool.
See the photos above. As of October 2016, the pool was half full of muddy water, but John bought a new submersible pump to which we can attached a long hose. When set up, we then pumped all the water out and let the pool dry out enough so we could spray the pool with concrete. We then filled it with bore water and used it as a dipping pool in the hot summer weather in December and January.
_______________________________________________________________
Construction Sequence:
A small mini – excavator digs out any mud and leaves on the bottom of the pool. This is so the pool can be sprayed with 100 mm of concrete the next day (just as well we didn’t have a thunderstorm that night !!).
John supervising the mini – excavator work.
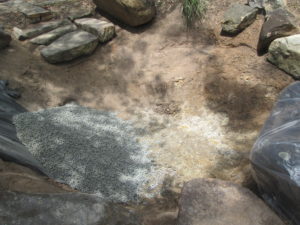
A 100 mm layer of gravel had to go in the bottom of the pool before it was sprayed with 100 mm of concrete the next day.
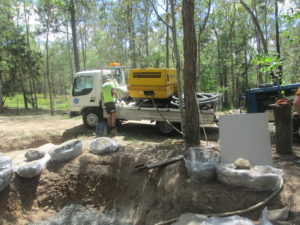
The concrete pump trunk in place for the concrete supply truck to come in at the right time. The timing was so important as the concrete pump trunk had to booked a week ahead as they are so busy.
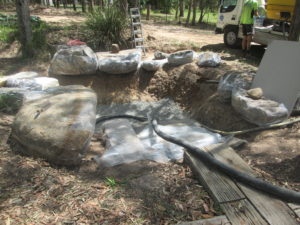
All the boulders are covered in plastic sheeting so no boulders would be contacted by the concrete spray. John organised all of this.
The concrete supply truck comes at the right timing …. mobile phones are very useful !! It is the right amount, earth-coloured concrete and polypropylene fibre mix and (a very non-standard mix). John organised all of this.
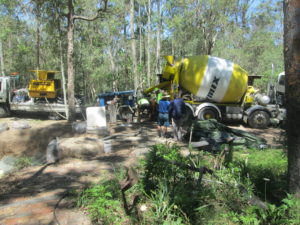

Spraying the pool up and in and around the boulders.
_______________________________________________________________________________________
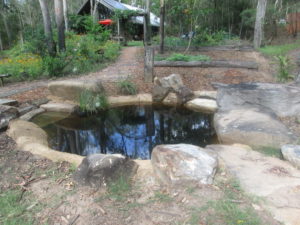
Filled With Water in January 2017

____________________________________________________________________________________
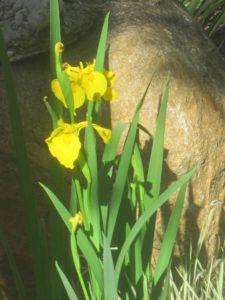
Plants in the Dipping Pool:
When we built the dipping pool in October 2016, we constructed several shelves 200 mm below the waterline with the intention of putting pots of plants down in the water to give the impression of a billabong.
____________________________________________________________________________________
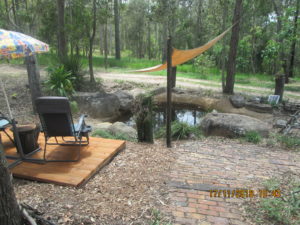
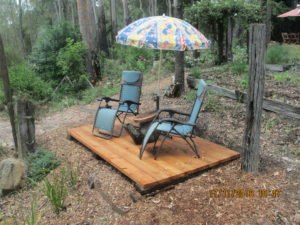
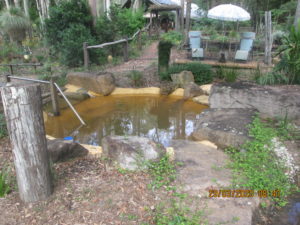
November 2018
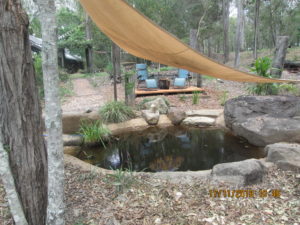
In early November, our son Anthony built this deck in one day to accommodate two chairs and an old beach umbrella we had. It is where we could go down to sit on a chair, read a book or enjoy the bush environment whilst enjoying the still water in our dipping pool. The dipping pool needed some work as well.
_______________________________________________________________________________________

______________________________________________________________________________
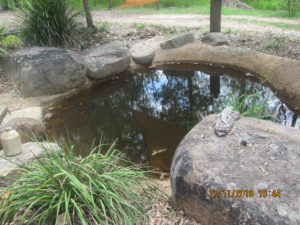
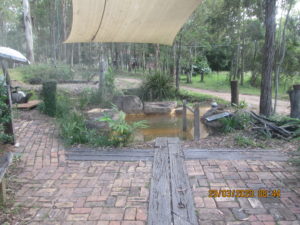
The Dipping Pool in March 2020:


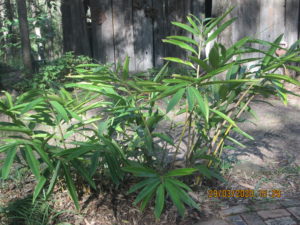
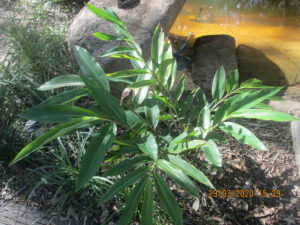
Cordyline stricta, known as the Slender Palm Lily, or Narrow-leaved Palm Lily is an evergreen Australian plant. A shrub to 5 metres tall found in wet sclerophyll forest and rainforest, usually on the coastal lowlands. From near Bilpin, New South Wales further north to Queensland. Wikipedia
Cordylines are local Rainforest under shrubs that provide a rich eye-catching sense of greenery.
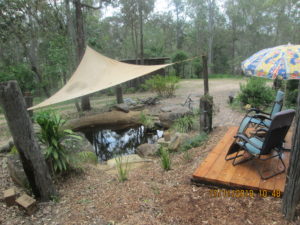
The Dipping Pool in October 2021:
_______________________________________________________________________________________